Pages

Showing posts with label DIY. Show all posts

Friday, May 2, 2014

DIY Etsy-Inspired Party Invitations

As you may know, our sweet & tiny little Reaganbaby recently turned one, and we threw a little celebration in honor of the occasion. I DIYed just about the entire thing because it's a lot cheaper that way, and because I like doing that kind of stuff. I also decided to document how I made everything so I could share it with you!

One of the first things needed when planning a party is invitations. Starting with our theme - You Are My Sunshine, and a color scheme - yellow, pink, and a splash of orange, I began searching for the perfect invitations. I first looked at Shutterfly, Tiny Prints, and Snapfish since they tend to be my go-to for photo cards. Sadly they had nothing relating to the theme or colors I wanted. Moving on from there I went more specialty and looked at Etsy. There are tons of great options on there and the sellers are usually very willing to work with you. I found several designs that I liked but that weren't in my color scheme. I could change that for a $5 fee. The other thing I needed customized was two separate dates and addresses because we had separate parties for my family and Josh's (our house just isn't big enough for one big party). That's another $5 fee. Most of the invitations I looked at were $12 for a printable file. So if I add $10 in customization fees, and I only need 9 invitations... I'm spending $22 on 9 invites? That's when I looked at the designs and decided to DIY!

This design {found here} was my inspiration...

I used the following supplies:
  • White cardstock
  • Patterned scrapbook paper
  • Plain contrasting cardstock
  • Grosgrain ribbon
  • Wallet-sized photos
  • Scissors and/or paper cutter
  • Scrapbook-quality glue
Here's how I did it:

{Side note: please excuse the poor quality of the photos. I was doing all party planning & prepping late at night after the girls were in bed, so the lighting is bad + I used my phone = ack}

I first created the design of the text using the word program on my computer. I played around with different fonts, colors and layouts until I was happy with the way it looked. All the while, I had to keep in mind that the cards would be 5x7", so I positioned the text so that it would print where I'd want it to be when the paper was cut to 5x7" {this was fairly simple just using the rulers along the top and side of the screen in the word program}. Once I had the design just the way I wanted it, I printed it out on plain white cardstock.

Since the invitations were going to be 5x7", I was able to print two per page. Once they were printed I used a 12" paper cutter {scissors would also do, you'd just have to measure and mark the paper carefully} to cut them to size.
{I printed in portrait orientation, cut vertically at 7" across, and then cut horizontally at 5" down the page to make two 5x7" cards. Since the cardstock was 8.5x11" I had some extra that needed to be trimmed off the bottom as well}

{What one 5x7" card looked like, printed and cut}

The next step was adding the decorative scrapbook paper. I chose a paper with a yellow chevron design. I wanted a simple band across the bottom of the invitation, so I measured and cut the bands to size and then glued them onto the cardstock with a few dots of scrapbook glue. Glue dots or probably any other adhesive would also work, you just don't want anything that will make the paper too wet so it doesn't look all wavy and wrinkly when it dries!


For the photo, I measured and cut pink cardstock rectangles to be just slightly larger than the size of the photos. I carefully centered the photos on the pink rectangles and glued them in place. Then I glued the whole thing onto the invitations.

The final touch was a band of grosgrain ribbon where the decorative paper met the cardstock. I measured the ribbon to be about 2" longer than the width of the invitation {so about 9"}. I applied a thin stripe of glue along the border of the decorative paper and pressed the ribbon on, leaving about an inch over the edge on each side. Then I flipped the invitation over, folded the ends of the ribbon down, and secured them with a dot of glue.


And the final product looked like this...

Here's another look at the inspiration photo for comparison. Not too bad, right?

It does take a little more of your time to DIY a project like this than it would to upload and order prints of a purchased file, but the cost savings is significant especially if you have some of these supplies on hand. Here's my cost breakdown:

Cardstock (had on hand) = Free
Decorative paper = $0.39 for one 12x12" sheet
Pink cardstock = $0.25 for one 8.5x11" sheet
Wallet photos = $0.50 for two sheets of 9 photos
Grosgrain ribbon = $1.98 for two 6' spools
Glue (had on hand) = Free
Paper cutter (had on hand) = Free

Grand Total = $3.12
Compare that to the customized Etsy price of $22.00 and remember that I only needed 9 invitations! That's over 85% savings.

With a little creativity, this design could be easily customized in countless different ways. A little ribbon, some colorful paper, any type of embellishment like the cute sun in the inspiration photo, or your own photos like I used, and you've got a beautiful invitation completely personalized for any occasion. One of the biggest advantages to DIYing this project, was that my invitations had texture and dimension. If I had purchased a printable file from Etsy, the whole thing would have printed like a photo- the ribbon, the sun embellishment and all would have just been a flat printed image on a piece of paper. I liked that the ribbon was actually ribbon on mine, and the embellishment {whatever I had chosen} was also 3 dimensional. 

Friday, December 6, 2013

Advent 2013

For me, there is no more exciting time of year than the Christmas season. I've always loved Christmas and do even more now that I'm a mom. Watching your babies experience the magic of Christmas - from Santa, to snow, to the miraculous birth of Baby Jesus - is like nothing else in the world. It gives me some serious warm fuzzies! So you can imagine my excitement each year when it's time to start the countdown. We celebrated Advent for the first time last year when I felt like Carsen was big enough to start understanding that Christmas is a celebration of the birth of Jesus. Of course, even this year she is a little young to grasp the notion of a savior, but I'm happy to start with the idea that we're celebrating his birth.

Last year, I made an advent calendar using some pretty winter cardstock I had on hand, and some leftover Christmas ribbon. You can read the how-to along with our list of Advent activities here. It was really cute, but it got on my nerves a little with the way it was assembled. So this year, I decided to simplify the calendar itself. I still wanted it to be reusable for future years, though, so I used a piece of foam-core posterboard and a pad of sticky notes. I started by making a calendar grid on the posterboard {it was 20" x 30" so I made 4x4 squares and left a 1" margin on each side of the 30" length}. Then I wrote each of the activities on the back of a sticky note - 23 total this year. Since certain activities are better for weekends or some are better for earlier/later in the month, I used our Google calendar to plan out what activities to do on which days and stuck them on the Advent calendar accordingly.
20131206-215812.jpg
Once all the sticky notes were in place, I just used silver and black Sharpies to write the countdown numbers on them. I personally like to do the numbers as a countdown, although I know a lot of calendars count up to Christmas. To hang it, I placed a command hook upside down on the back of our basement door. Then I hot glued some ribbon to the back of the calendar and looped the ribbon over the command hook. Voila!


20131206-215943.jpg
 Originally, I had my heart SET on red sticky notes. In my mind, they were everywhere for the holidays. I mean, they're sticky notes... how else would they capitalize on the holiday season?? In reality, I could find them nowhere. It got to be a few days in when I finally decided to just use blue and go with a "winter" color scheme. They're a little too electric blue for my taste, but I feel that I did the best I could with the resources that were available. I did find a pack of Post-Its that were more of a dark blue and they would have looked better, but I couldn't bring myself to spend $8 on a 6-pad pack when I only needed 23 stickies. UGH. I'll begin my hunt for red {or even a nice true green that's not neon!} for next year's calendar promptly on January 1st.

In the mean time, here's our list of activities for this year:

  • Decorate the tree and our house together

  • Read "The Story of Christmas"

  • Make cards for soldiers

  • Write a letter to Santa {Carsen dictates, mommy writes. Save it in her baby book!}

  • Visit Santa {at the mall}

  • New Christmas jammies

  • Christmas movie night #1 - Carsen's pick

  • Make ice cream cone Christmas trees with cousins

  • Learn about the symbols of Christmas

  • Make paper cone Christmas trees for decorations

  • Visit Valley View Farms {Carsen LOVES looking at Christmas trees in the stores, so this is a huge treat for her}

  • Make brown paper garland {like this} for decorations

  • Christmas movie night #2 - mommy's pick

  • Make gifts for grandparents

  • Make & decorate cardboard "Gingerbread" houses

  • Go see Christmas lights in the neighborhood

  • Read "The Night Before Christmas"

  • Make ice bubbles

  • Christmas movie night #3 - daddy's pick

  • Hot cocoa bar {like the one in this post}

  • Make a birthday card for Jesus

  • Bake cookies

  • Make {prep} a special breakfast for Christmas morning


Some of these are repeats from last year and some are new. As Carsen {and eventually Reagan and any future siblings} gets older there's more she can understand and participate in, so I'll change and adapt what we do each year accordingly.  Some things will probably always be on there like decorating the tree and house together as a family, Christmas movies, baking cookies, and making gifts for grandparents. In the future I'd like to add more service-related activities like volunteering and gathering food, toys, clothing or household items for donations {right now we usually do that around Thanksgiving}.

So far, we have... decorated, read "The Story of Christmas," made cards for soldiers, written a letter to Santa, visited Santa, and gotten new Christmas jammies.

20131206-220007.jpg


IMG_9974 2

Friday, February 22, 2013

Carsen's Quilt: Inspiration

Up next in the big girl room is to make a quilt, bedskirt, and window valence. I've decided to make, rather than buy, a bedspread because Carsen has a daybed (as you can see here). One side of the bed is against the wall and the other side has a railing so she doesn't roll out. That leaves no room for a regular twin-sized bedspread to hang over the sides so it would be all bunched up on the bed. Instead, I thought making a blanket that fit the surface of the bed would work better... and be cheaper! Here's a preview of my inspiration, fabrics, and plan!

I am not a quilter, first of all. Rather than following an intricate pattern, I am much more likely to eyeball something, or see a picture of something and make up my own way of achieving that final product. I also have pretty simple taste when it comes to decor. Especially for a child's room, I don't want anything fussy. I'm not entering it in a quilting bee at the state fair, I just want something cute and functional. So when I set out on a Pinterest search to find inspiration for a DIY quilt, I was really happy to find a rag quilt that seemed to be exactly what I had in mind.
This is my inspiration photo... 
{Tutorial found here}

I like how the mixture of fabric patterns makes it casual, yet sweet. The rag seams also give it a casual and handmade look. I am making a couple of adjustments to this pattern. I've decided to use one single fabric on the back side of the quilt while using the different fabric patterns on the front, I only selected 4 different fabrics to use instead of 7, and my dimensions will be a little different from the tutorial since I'm making it to fit the surface of a twin-sized bed. The great thing about this tutorial is that it's easily adaptable. You can take the basic idea and then customize it however you'd like. 

So here are the fabrics I chose held up to the wall in her room. It's a really gray day, so you'll have to trust me {or check back here} that her walls are not that dull of a color.

Since my mom is more serious about her sewing and has some quilting tools, I'll be measuring and cutting my fabric strips at her house this weekend and then assembling my quilt next week. I am so so so excited about completing this piece of the room. Not only do I really feel like it will help tie things together and give the room a more finished look, but I love that she'll have a blanket handmade by me. Hopefully my craftsmanship will endure for many years to come so she can take it to college with her and later force her future husband to respect her desire to feature it on a rocking chair in their bedroom or something... hahaha :) A mom can dream, right?

Saturday, February 16, 2013

The {Mostly} Finished Big Girl Room

Well here it is! The "Big Girl" room is finally done, save for a few small minor decorative details. OK, so yes that basically means it's only painted. But if you recall, that was my main goal for now. It may have taken a little longer than originally planned, but if you consider a handful of unforeseen snags in addition to working around a toddler who uses that room, I don't think I did half bad.

Just as a quick refresher, we started with plain walls. I added a board & batten wall treatment that I assembled myself, and then painted. I'll give basic tutorial info with each photo.

First things first, I went to Lowes and had them cut a 4'x8' sheet of MDF into strips. I asked for 8 strips 4" wide, and about 20 strips 2" wide x 39" tall. Lots of tutorials for this project that I've seen online were very reassuring that Lowes will do all of your cuts for you making your project a breeze. Ok, well as I was standing there after showing the kind gentlemen my diagram of how I wanted the 4'x8' sheet cut up, I noticed a sign that stated, "The first 2 cuts are free, for bigger jobs we sell saws in the Tool Department." Eeek! I felt horrible. The guys were super nice though and didn't even charge me. My advice though: don't go into Lowes assuming that they're happy to make 692 cuts for you because they're really not supposed to even if they will :-/  

I began by mitering the bottoms of my 2" vertical strips so that they weren't a blunt square edge where they met the baseboards. Then I went around the room and measured out where each one would go. This is when I did my leveling and just made a simple pencil mark on the wall so that when it was time to do the application it was pretty quick and easy (I did double check and re-level at that time though). Once that was done, I applied the strips to the walls with some adhesive (like Liquid Nails) and 3 brad nails each. Then I placed the 4" strips horizontally across the tops of the vertical strips to make a chair rail-like border around the room. After all the wood was applied I used wood putty and a molding caulk to fill in any gaps.


I used Lowes zero-VOC paint + primer in a semi-gloss white for the woodwork and below. I gave all the woodwork a first coat of paint since it was completely unfinished to start with. Then I did a second coat over everything with a roller.


Then of course, all that was left was to paint the top half of the walls in our mixed paint color. I also used the zero-VOC paint + primer for that and had Lowes color-match it to Sherwin Williams' Open Air. It looks plain blue in this photo, but it's actually quite turquoise.

---------------
Here are some photos once the room was reassembled. You'll notice the lack of 'finished' details. Try to keep in mind that I'll be adding a bedskirt to hide the trundle, a coordinating quilt, and valence over the window. Since her absolute favorite color everything is PINK, I'll be doing all of those accents in varying shades of pink.


We're also still using an Ikea end table to pile some of her favorite bed time books on, for now. We'll be replacing that this week with the Ikea spice-rack book holders of Pinterest fame for a nice thin profile (as you can see, its a small space so maximizing is important). We'll also add a bean bag chair or other type of cozy seat to make that a perfect little reading corner for her.

Our girls' rooms, side-by-side!

So there we are! 
And the baby-prep to-do list continues :)

Sunday, January 27, 2013

Big Changes in the Big Girl Room

Things are coming along quite nicely in Carsen's big-girl room and it looks like we'll be finishing it up right on the 8-week mark (Tuesday)!

So far we've bought wood, cut the pieces needed for the wall treatment, and applied them all the way around. Next up we need to sand some edges, fill in any gaps in the woodwork and walls (since neither are ever perfectly straight), and then paint. I'm anticipating the wood needing two coats of primer + paint, and the walls taking one. We have the white paint we'll be using on the bottom half of the walls but the color matcher at our Lowes has been broken so we haven't picked up the mixed paint which will be going on the walls above the woodwork. The color we're using is called Open Air by Sherwin Williams (swatch below). I'll give details on how we did the wall treatment in a later post!


Paint will be going up over the next couple of days and then we'll just have textiles, decorating and accessories left to do in there. While important, I feel like I can get those things done over time without an imperative deadline. She has bedding on the bed and shades on the window, they just aren't necessarily related to the new color scheme.

Say tuned for the mostly-finished product in a few more days!


Monday, January 14, 2013

Oh, Why Not

It's 11:00 on a rainy Monday night, I'm eating peach pie, and I thought you should know this. Well, this and the fact that I am multi-tasking my pre-baby#2 to-do list (lots of hyphens...). As of tomorrow we are just 10 weeks (ish, because you never really know) away from the arrival of our new baby. I might be having some slight internal stress over that. I think having the holidays right in between "too early to worry about that stuff" and "OMG we're running out of time!" has kind of thrown me off. The items I'm trying to work on simultaneously right now are Carsen's room and her baby book. Seems kind of an odd to-do list as we're preparing for a second baby, but both are actually re-do's that I'm worried won't get done after the baby is here. I hate planning projects that never get done.

Carsen's room, like I've mentioned, is planned but I need the time to get it done (that is, not when she's sleeping in it and not when she's awake and running around my ankles. You tell me when that is). It's small, so I'm hoping it won't take too much time. I am insisting we go to Lowes tomorrow for some supplies I need so that is not a hinderance when I'm ready for them. I may also delegate some of the textile work (quilt, bedskirt, window valence) to my mom if I start running out of time.

The baby book re-do is actually going well. I think since she was our first, when I sat down to make it originally I tried to include too much (like half a million photos). Then I also had a store-bought baby book that I used more for recording milestones and such and I really just want that stuff in one book. I've decided to try to save myself some time by printing a lot of the page labels with some cute fonts I downloaded. Too many times I get annoyed if my own handwriting doesn't turn out perfectly, or it looks different one night than it did the night before. I can't stand that, plus hand writing everything takes a lot more time. So I'm working on typing up all the little labels I'll need on the pages, then I'll assemble the pages and fill in the photos. I'm limiting 1-2 photos per occasion to try and be reasonable and efficient. The plan is to use the same layout/template to put Reagan's book together, hopefully much more easily.

In other getting-ready-for-baby news, we're now officially on the 2 week schedule for doctor visits. I think that has also contributed to my sense of urgency. We have our next appointment Wednesday. So far everything has looked and sounded perfectly on schedule. I passed my glucose test with flying colors also, which was a relief since last time my sugar was somehow low and I had to go back for the 3-hour test. At this point I don't think I need any other testing or blood work! I've been feeling really good other than starting to run out of room for bending, reaching, sitting, and breathing. That's kind of annoying at times (shoe-tying is the worst) and much more of an inconvenience since I have a toddler to take care of this time. It's getting pretty hard to bathe her, dress her, put on her shoes, help her use the potty/wash her hands, lift her in/out of the car or high chair, and pretty much anything else that requires me to bend in half at the waist. I've also switched to eating small, protien-based "meals" 4-5 times a day. Sometimes it's an apple and peanut butter, or cottage cheese and fruit, or a hard-boiled egg. I just can't fit a big meal in there and I get super uncomfortable if I eat too much at a time. It's nice not ever getting super hungry though. I may even keep up that pattern once she's born. Lord knows you never get a hot meal with an infant anyway ;) The up side to getting bigger is that I can feel Reagan moving around almost constantly which is both fun and reassuring. While I'm somewhat uncomfortable at night I still feel like I'm sleeping pretty well, I haven't had heartburn or many of the other issues a lot of people experience later on in pregnancy. I'm just hoping my energy stays up over the next 10 weeks so I can get all the things done that I need to!

I should probably start by getting to bed....

Saturday, December 22, 2012

DIY Gift Tags

As the gift wrapping gets under way around here, I thought I would share the one aspect of my wrapping that is DIY this year! I am using all of my white card stock scraps to make gift tags! What else do you do with all those remnants anyway?? It's the easiest thing in the world. I'm not measuring or anything, just cutting my remnants (mostly big strips/rectangles) into small rectangles and trimming the corners on one end. They're somewhat imperfect, but close enough that you'd never be able to tell unless you really looked hard. To add a little festive touch, I'm using a silver Sharpie to make a border just away from the edge. You could use any color you wanted to suit the occasion or match the gift wrap you're using.

Since I'm a recycler/re-user, I totally re-use gift bags that are in decent shape. I just hate when I have a perfectly good gift bag but the tag has already been written on. These gift tags are super easy to attach to gift bags, solving that problem! I just use a hole punch to make a hole, and then cut a slice from the edge of the tag into the hole. You can easily slip the handle of the gift bag into the hole but it closes up well enough that the tag stays on.

I've seen a lot of great ideas for DIY gift tags out on Pinterest but I must admit I haven't looked at many of them. This is a great way to save yourself from having to spend an extra $5-$10 on gift tags considering an entire pack of 50 sheets of white, 8.5x11" card stock is $1.99. That's practically gift tags for life. My husband asked me to make some for him and I had 10 of them ready in less than 5 minutes. They could easily be made while watching a Christmas movie or catching up on your DVR, then when you're ready to wrap your tags will be there waiting for you :)

Happy wrapping!

Monday, April 23, 2012

Birthday Party Bliss!

Here's the full report on C's Spring Fling party for her 2nd birthday with all the fun details and pictures too, of course! I did my best to capture everything, but I also put everything together myself so I was a busy bee and missed photographing a few things here and there! 

First, I'll say that the theme was "Spring Fling" and I use the word theme kind of loosely. I kept everything pretty well tied into spring time/outdoor play, but I'm not at this level or anything (though I really do love a lot of the ideas on there!). I'm all about DIYing things as well as putting together something cute and fun for very little cash, so I DIYed pretty much everything.

Since we were having the party at a playground I decided not to do a lot in the way of decorating. We used plain brown paper to cover the tables because it's cheap and you can color on it with crayons, and we had some balloons. We were outside on a gorgeous (thank you, Jesus!) spring day.. what more spring decor do you need beyond spring itself? And do little kids care if there's a centerpiece on the table? They do not.

For fun we of course had the playground, and I brought along sidewalk chalk and bubbles. Classic outdoor fun for kids of all ages!


I did fruit and veggie cups for munchies since spring is the time when we get our gardens growing. We had pizza for lunch (not that springy, oh well), and dirt cups in place of cake/cupcakes! I failed to take pictures of the fruit and veggie cups but try to imagine apples, grapes and cheese cubes together in some little cups, and then carrots, celery and broccoli together in some other cups. That's pretty much what they looked like. More excitingly, here are the dirt cups:

Before we sang Happy Birthday and opened presents J, C, and I snuck away for some birthday girl photos!


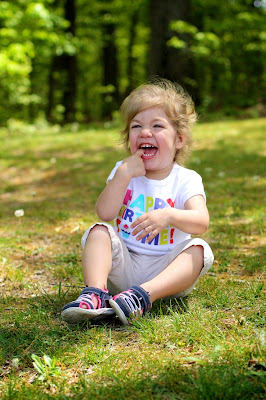
That is a happy kid :) 
Why I didn't think to straighten up her hair before taking these photos, I can not say.

Here she is sitting with her cousin, Sophie on the playground.


 Our happy girl!


Finally time to sing Happy Birthday and eat some cake dirt! :)  We have been reading a book about feelings (by her choice) for a few weeks now in which it is Big Bird's birthday. He keeps asking his friends if they want to come over to play with him but they are all busy doing other things. In the end they are all at a surprise birthday party for Big Bird and she loves pretending to blow out the candles on that page. We talked about how we were going to have a birthday party for her and all of her friends (cousins) would be there and we would sing and blow out candles. She always acted very excited so I was interested to see how she would really react.


 Turns out, she was a pro :) 


 She loved the dirt cups! 
Her cousin, Evan looked a little more skeptical...

Time for presents!  She was hilarious and thought that when we said the present was from someone that it was actually for that person, so she was trying to give each person their gift.

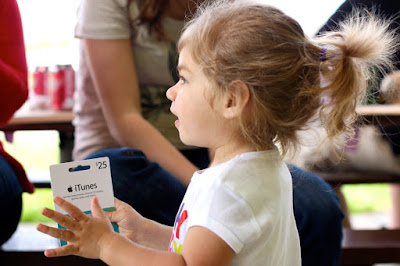
iTunes gift card for some new music to sing & dance to!

Lots of pretty spring clothes...


What?! New flip flops?? Girlfriend had to change shoes immediately.
When it comes to shoes, she does not play.

Her new best friend, Abby Cadabby


A new guitar for our little rock star :)

A doodle board because she loves to "color paper!" and this saves paper :)

Her pots and pans which she has been carrying around from the minute we opened them... wearing the oven mitt (I know you just burst out laughing, Laura, haha)

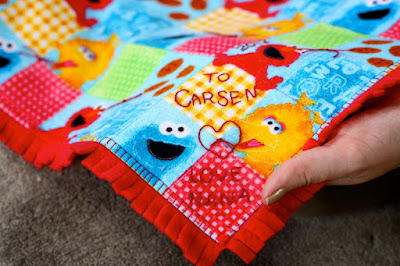
A Sesame Street blanket made by Nana


-----

She is definitely one lucky kid :)  And to thank all of her cousins who came to help her celebrate, I put together thank-you bags that included...


Pinwheels...


Bubbles with pipe-cleaners for making wands...

Sidewalk chalk...


And ready-to-plant flower cups (Cosmos, for anyone wondering)

All of these things were really easy and fun to make. I bought one pack of $10 scrapbook paper, a box of straws for $1.50, a bag of paper fasteners for $3, some Dawn for around $3, corn syrup for another $2-ish, a giant box of sidewalk chalk for $4.50, seed packs for $5, and a pack of ten plantable cups for $1.50.  I put everything in brown paper lunch bags and made name cards to glue on them. 

The morning was kind of whirlwind because I had to do some things last minute like cutting up the apples (can't let them to turn brown!) and assembling the fruit/veggie and dirt cups since they all have to be refrigerated. But once I made it down to the park with the rest of our stuff, it was... well, an afternoon in the park! I was so SO glad the weather stayed nice since the forecast had been questionable earlier in the week. It was a gorgeous day with our favorite people, and really, we couldn't have asked for any more than that!

Tomorrow is C-baby's actual birthday (I can't believe it!) and we have another day of fun planned for her. J is taking off work and we are spending the day together and then Nennie is coming over to play in the afternoon since she was working on the day of the party. C will be super excited to see her :)  Check back later this week to see how we spent our birthday girl's special day!